When does learning end? Many of us believe learning ends the day they hand us our diploma or degree. As a matter of fact, we are learning every moment of our lives but we are so busy focusing on other things, to miss the lessons being taught to us.
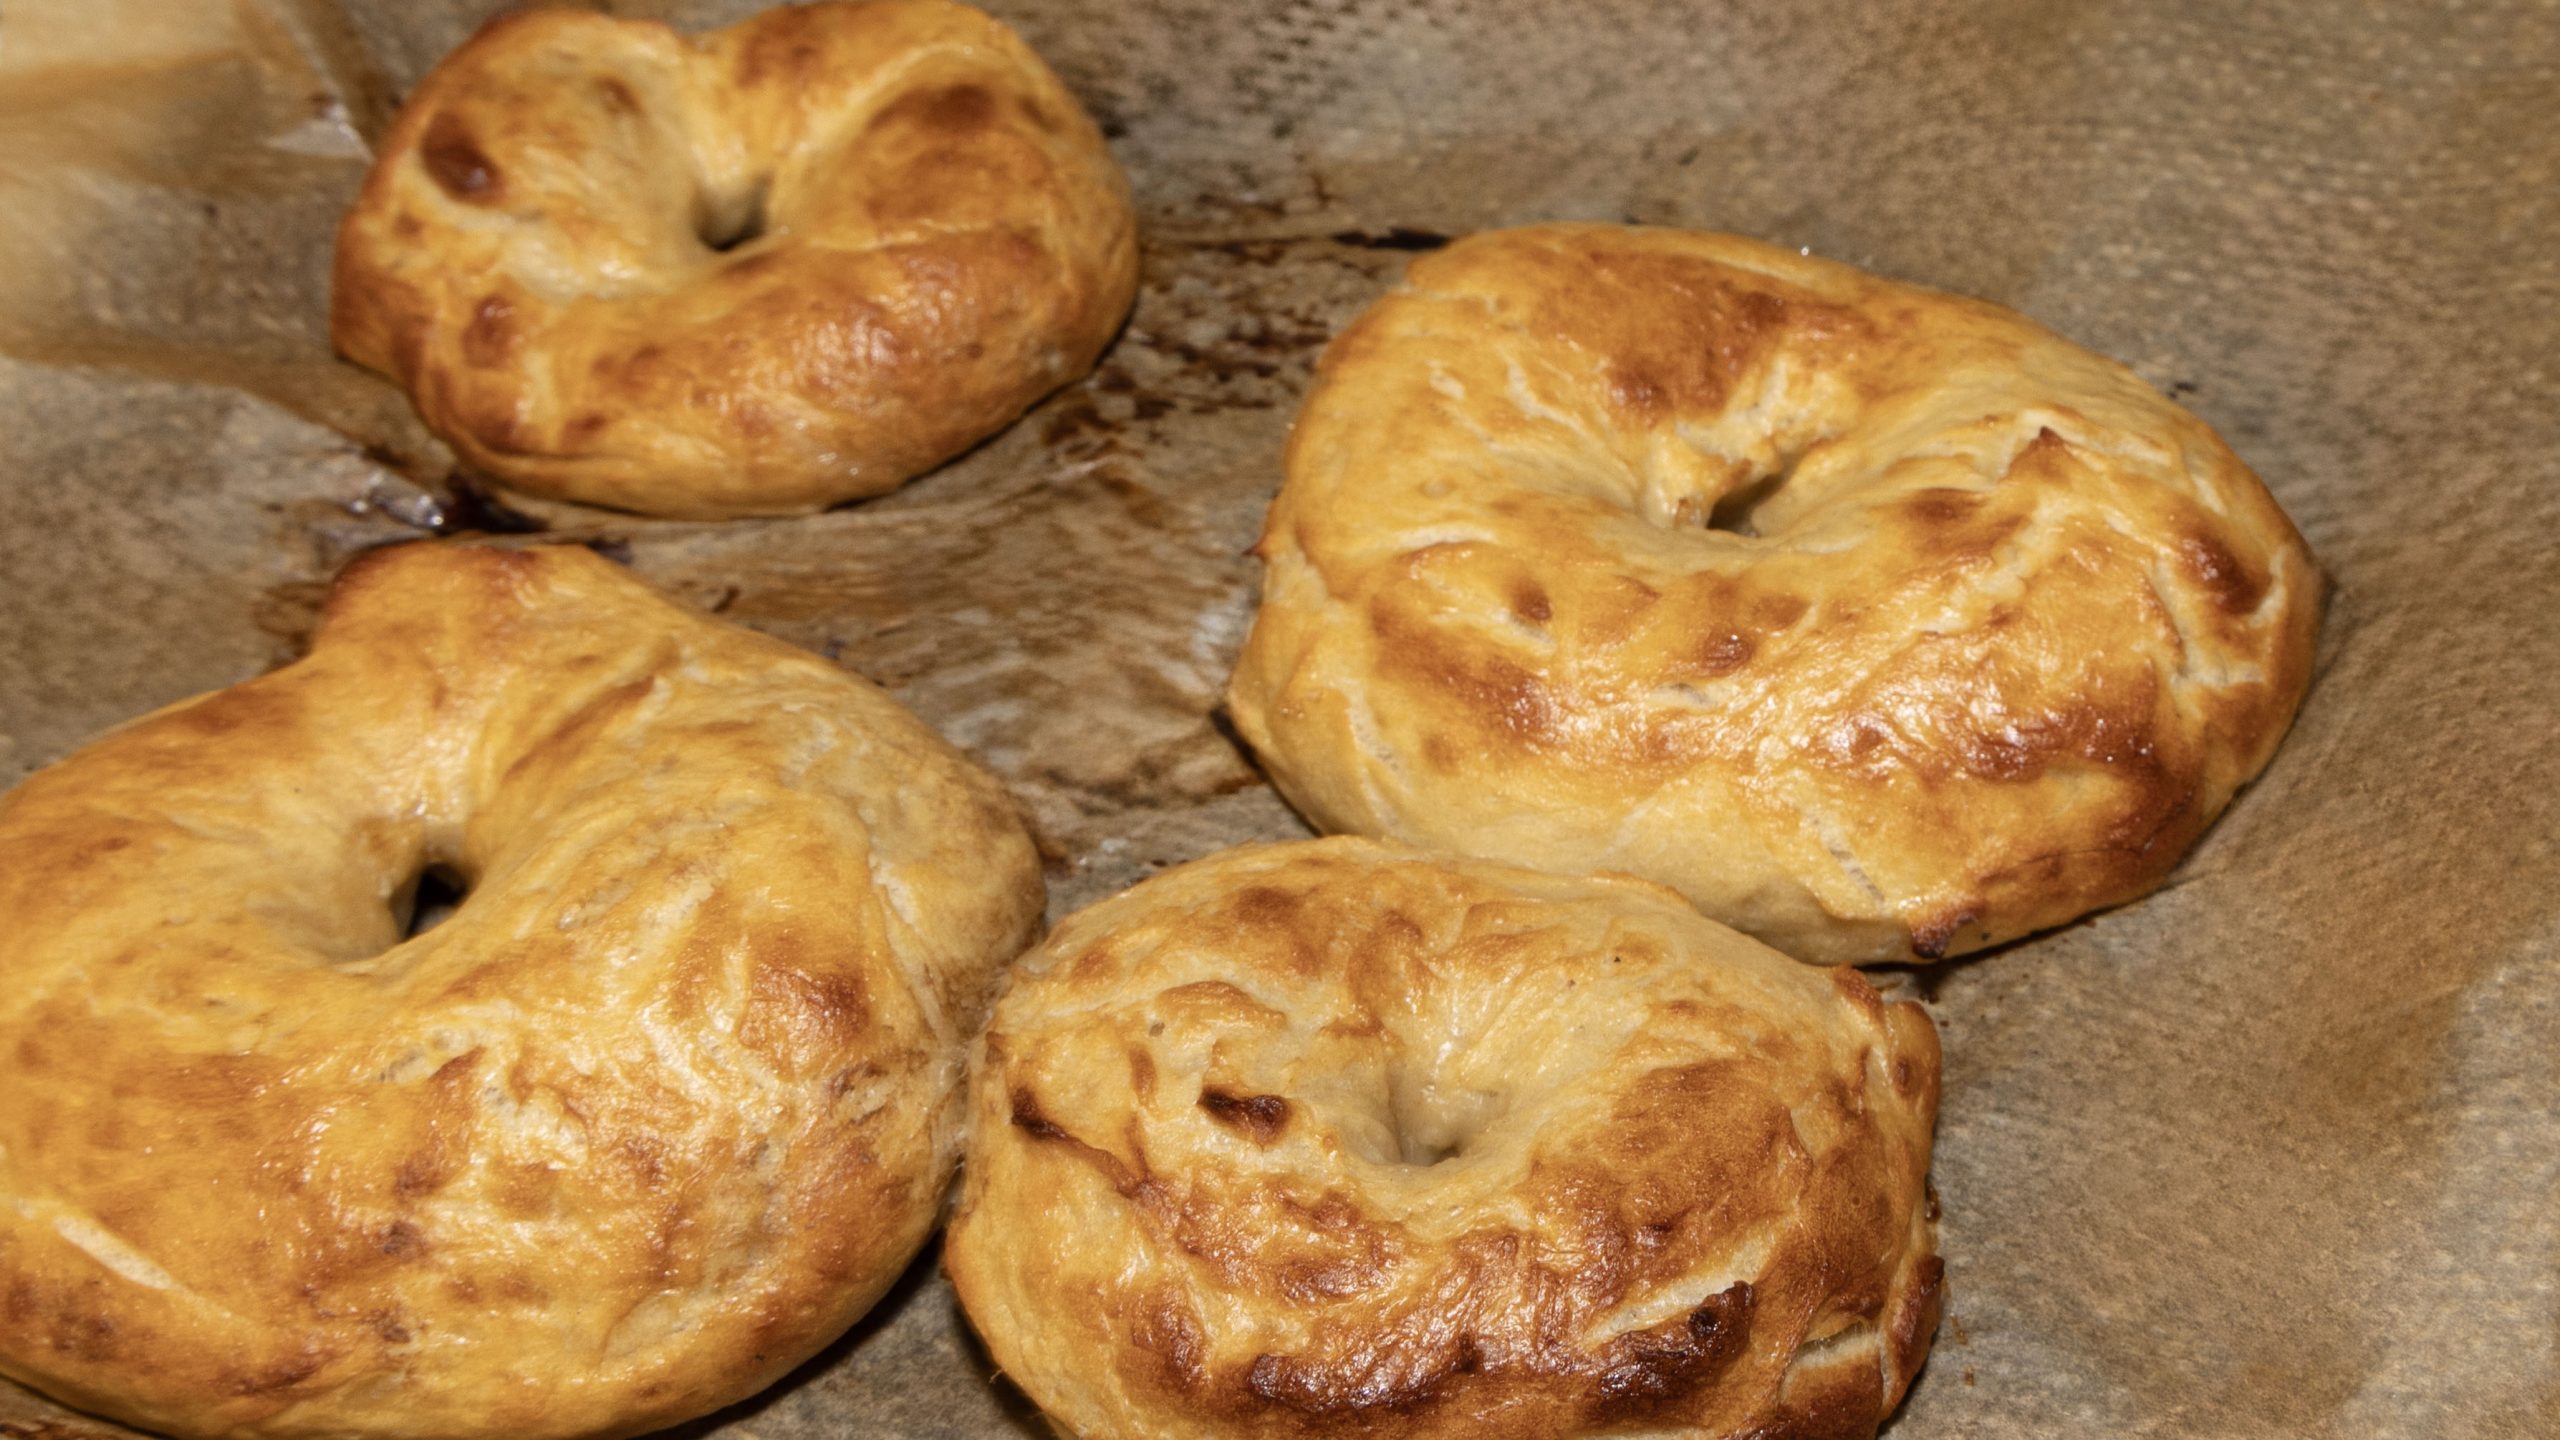
On 14 February 2024, Valentine’s Day, I was live streaming on how to make homemade bagels to save you money and I learnt a very important lesson. Bagels are lean yeast. Meaning you are not using a fat, like oil, milk, or butter to make them. Fats in bread has two primary functions. One function is to slow the rising of the dough. The second, most important, it helps to soften the bread. When making bagels, the sought after texture is more of a chewy versus soft and by adding fat means your bagels will be soft instead of chewy. From a cost perspective, since the recipe does not require fat to make it it means, to make homemade bagels the cost is minimal (bread flour, water, salt, yeast, and sugar). When you already have the ingredients at home the cost is around a £1 for 8 large bagels versus £5 – £7 or more for a dozen.
copyright (2025) by Berry Photography (R) all rights reserved.
While making the bagels, the biggest challenge I faced was the boiling water bath. The first one I put into the bath, fell a part, which is the bagel in the lower right corner of the above photograph, leaving a side relatively thin. Because the bagels use barley syrup in the dough and in the bath, they came out already tan. This made it a bit difficult to know when they were done and ready to come out of the oven.
When the bagels finally cooled and I could cut into one, I found the texture was somewhat unexpected. I am used to store bought bagels that are relatively soft and easy to cut. These were a little bit of a challenge to cut it but with a sharp bread knife, I had no issue cutting it. The insides we soft and no major air holes, which left me pleased. Then when I bit into it, the texture was chewy with a hint of barely to it, which made it very delicious.
So how long did it take me? From start to taking them out of the oven it was just over 2.5 hours but if I was strict by closely watching my dough, I would estimate probably closer to 2 hours in a warm kitchen. In this journey, I allowed the dough to double in size in over 2 hours when, it could have taken closer to 60 to 90 minutes.
As I reflect back on this experience, I do have to wonder if I have over knead my bread dough leaving it a bit more chewier than necessary and I wonder, if I let the bath boil too long before turning it down. Even if I knead it properly and the bath water did not boil so long, this experience taught me one thing about life, it taught me about confidence, being able to draw on my previous bread making experience to making a new type of bread. Making bread, is a journey because you are always learning and discovering new things about yourself.
If you make homemade bread, what has making bread taught you about yourself and life?
copyright (2025) by berry photography (R) all rights reserved
Every journey starts some where. As a pure novice to sourdough breads, I started my journey. My first sourdough was frought with problems that ultimately led to a bread that was unproofed and could be used as a door stop because it was so hard. When I made my English Muffinsthis week, I had some extra starter and tried my sourdough bread, again. While not 100% ‘spot on,’ it was a significant improvement. This article will explore the changes I made.
copyright (2025) Berry Photography (R) all rights reserved
Starter
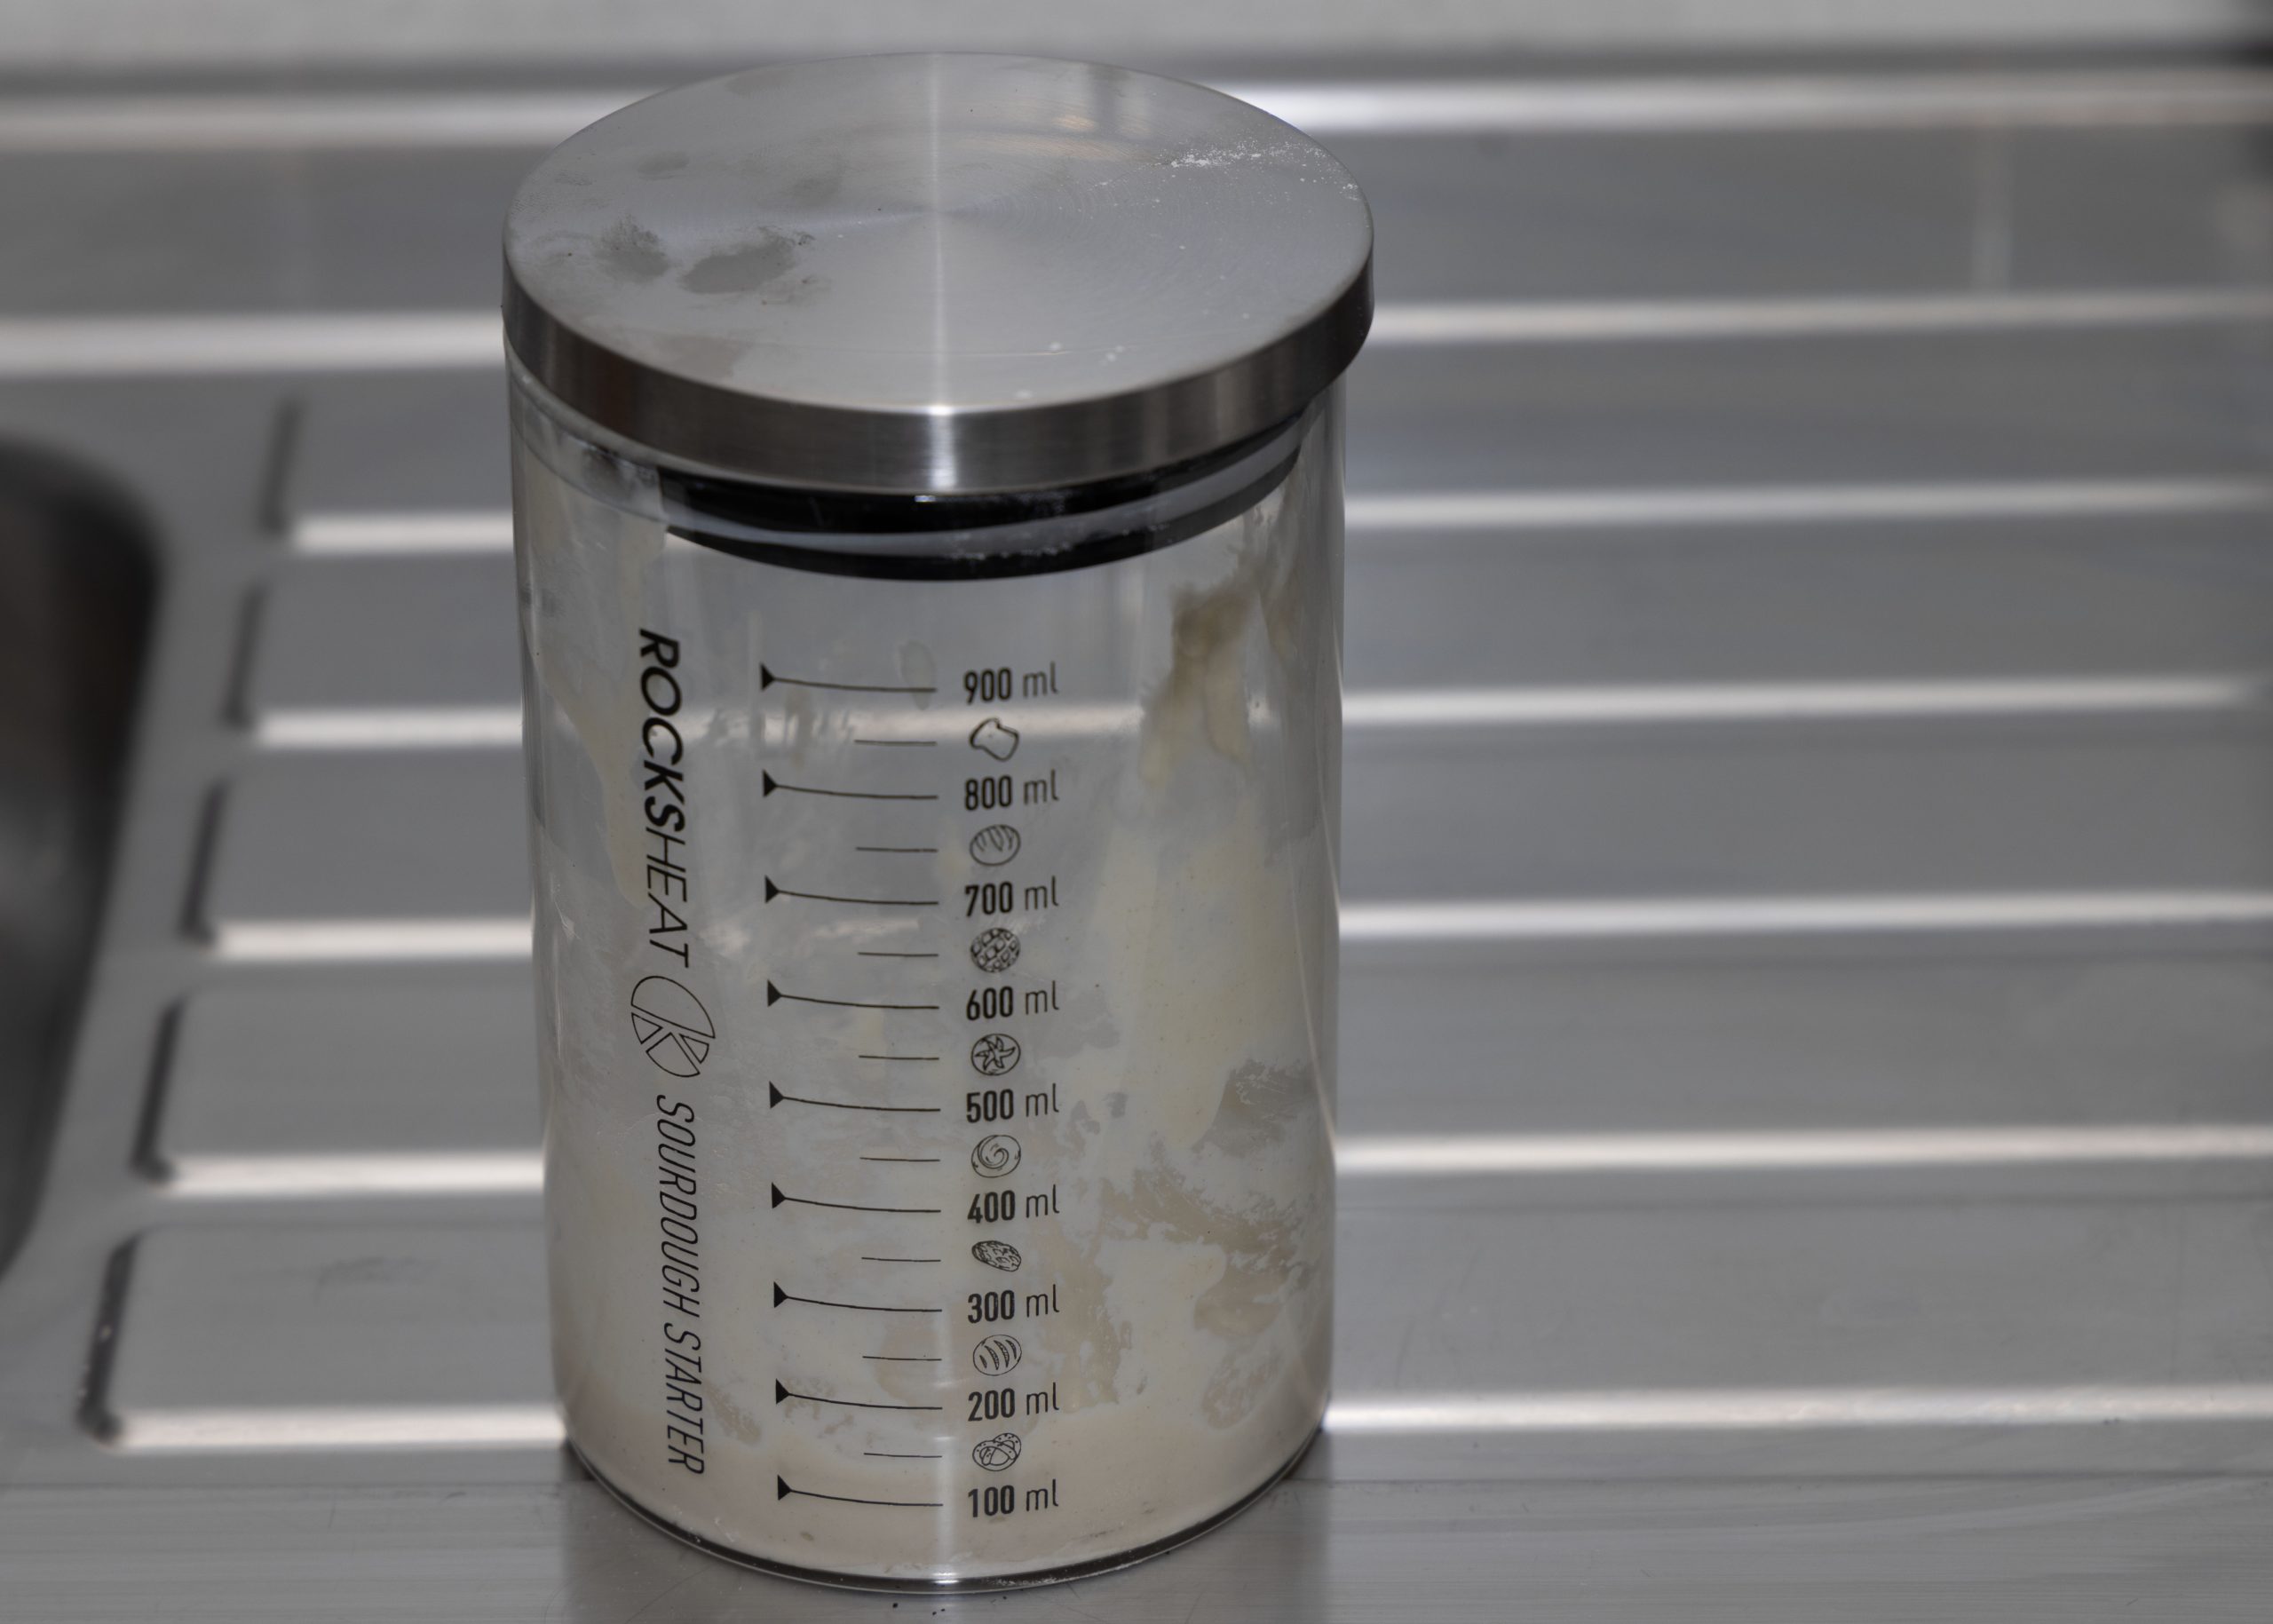
As I analyse the situation I note that my kitchen is on the warm side, running around 75 degrees Farenheit. Though, I do question, if for a part of the time with my first loaf, if the kitchen was cool under 70 degrees Farenheit. This led, at times, for my starter to ran runny and not growing as quickly. So to fix it, I had to vary the ration of starter, flour, and water for the feed. I found a 1 part starter to 2 parts flour and 2 parts water worked quite well and sometimes 1 parter starter, 1 part water, and 2 parts flour worked. However, if I used the latter then an extra stir was need about 1 – 2 hours later to ensure all of the flour got mixed and a 1:1:2 ratio was only needed for a day because the started would not rise if I kept using the 1:1:2 ration. What I found that was critical was ensuring the flour was fully mixed and I did feel the temperature of the water was also a factor. So, I tried to keep the water cool and not too high as it led, I feel, to a runny starter.
Making the bread
Once the starter was doubling in size, it was time to make the bread. The first time I added the starter to flour and salt it was a bit sticky. Relying on my previous bread making experience, the stickinees made me thing more flour was needed and I added a bit more flour. The second time, the flour soaked up the starter water mixture and was overly dry. So, again relying on previous experience, I thought water was needed.
As I look back, I do question if my intervention (adding more flour the first time and adding more water the second time) led to the results.
Both times, I found that the bread did rise quicker than expected. The second time the bred was showing it was being underproofed and I did make attempts to save it. First attempt was to do more stretching of the dough, which did make it less sticky. However, after letting it rest, it became sticky again and this time I did put it in the fridge for about an hour. After the hour, the dough was expected.
Cooking the Bread
The first time, I put it into a 5 quart dutch oven and covered it. When i took of the lid, the dough appeared somewhat flat and translucent. After it finished cooking, the first attempt the dough was so hard, I could not cut into it.
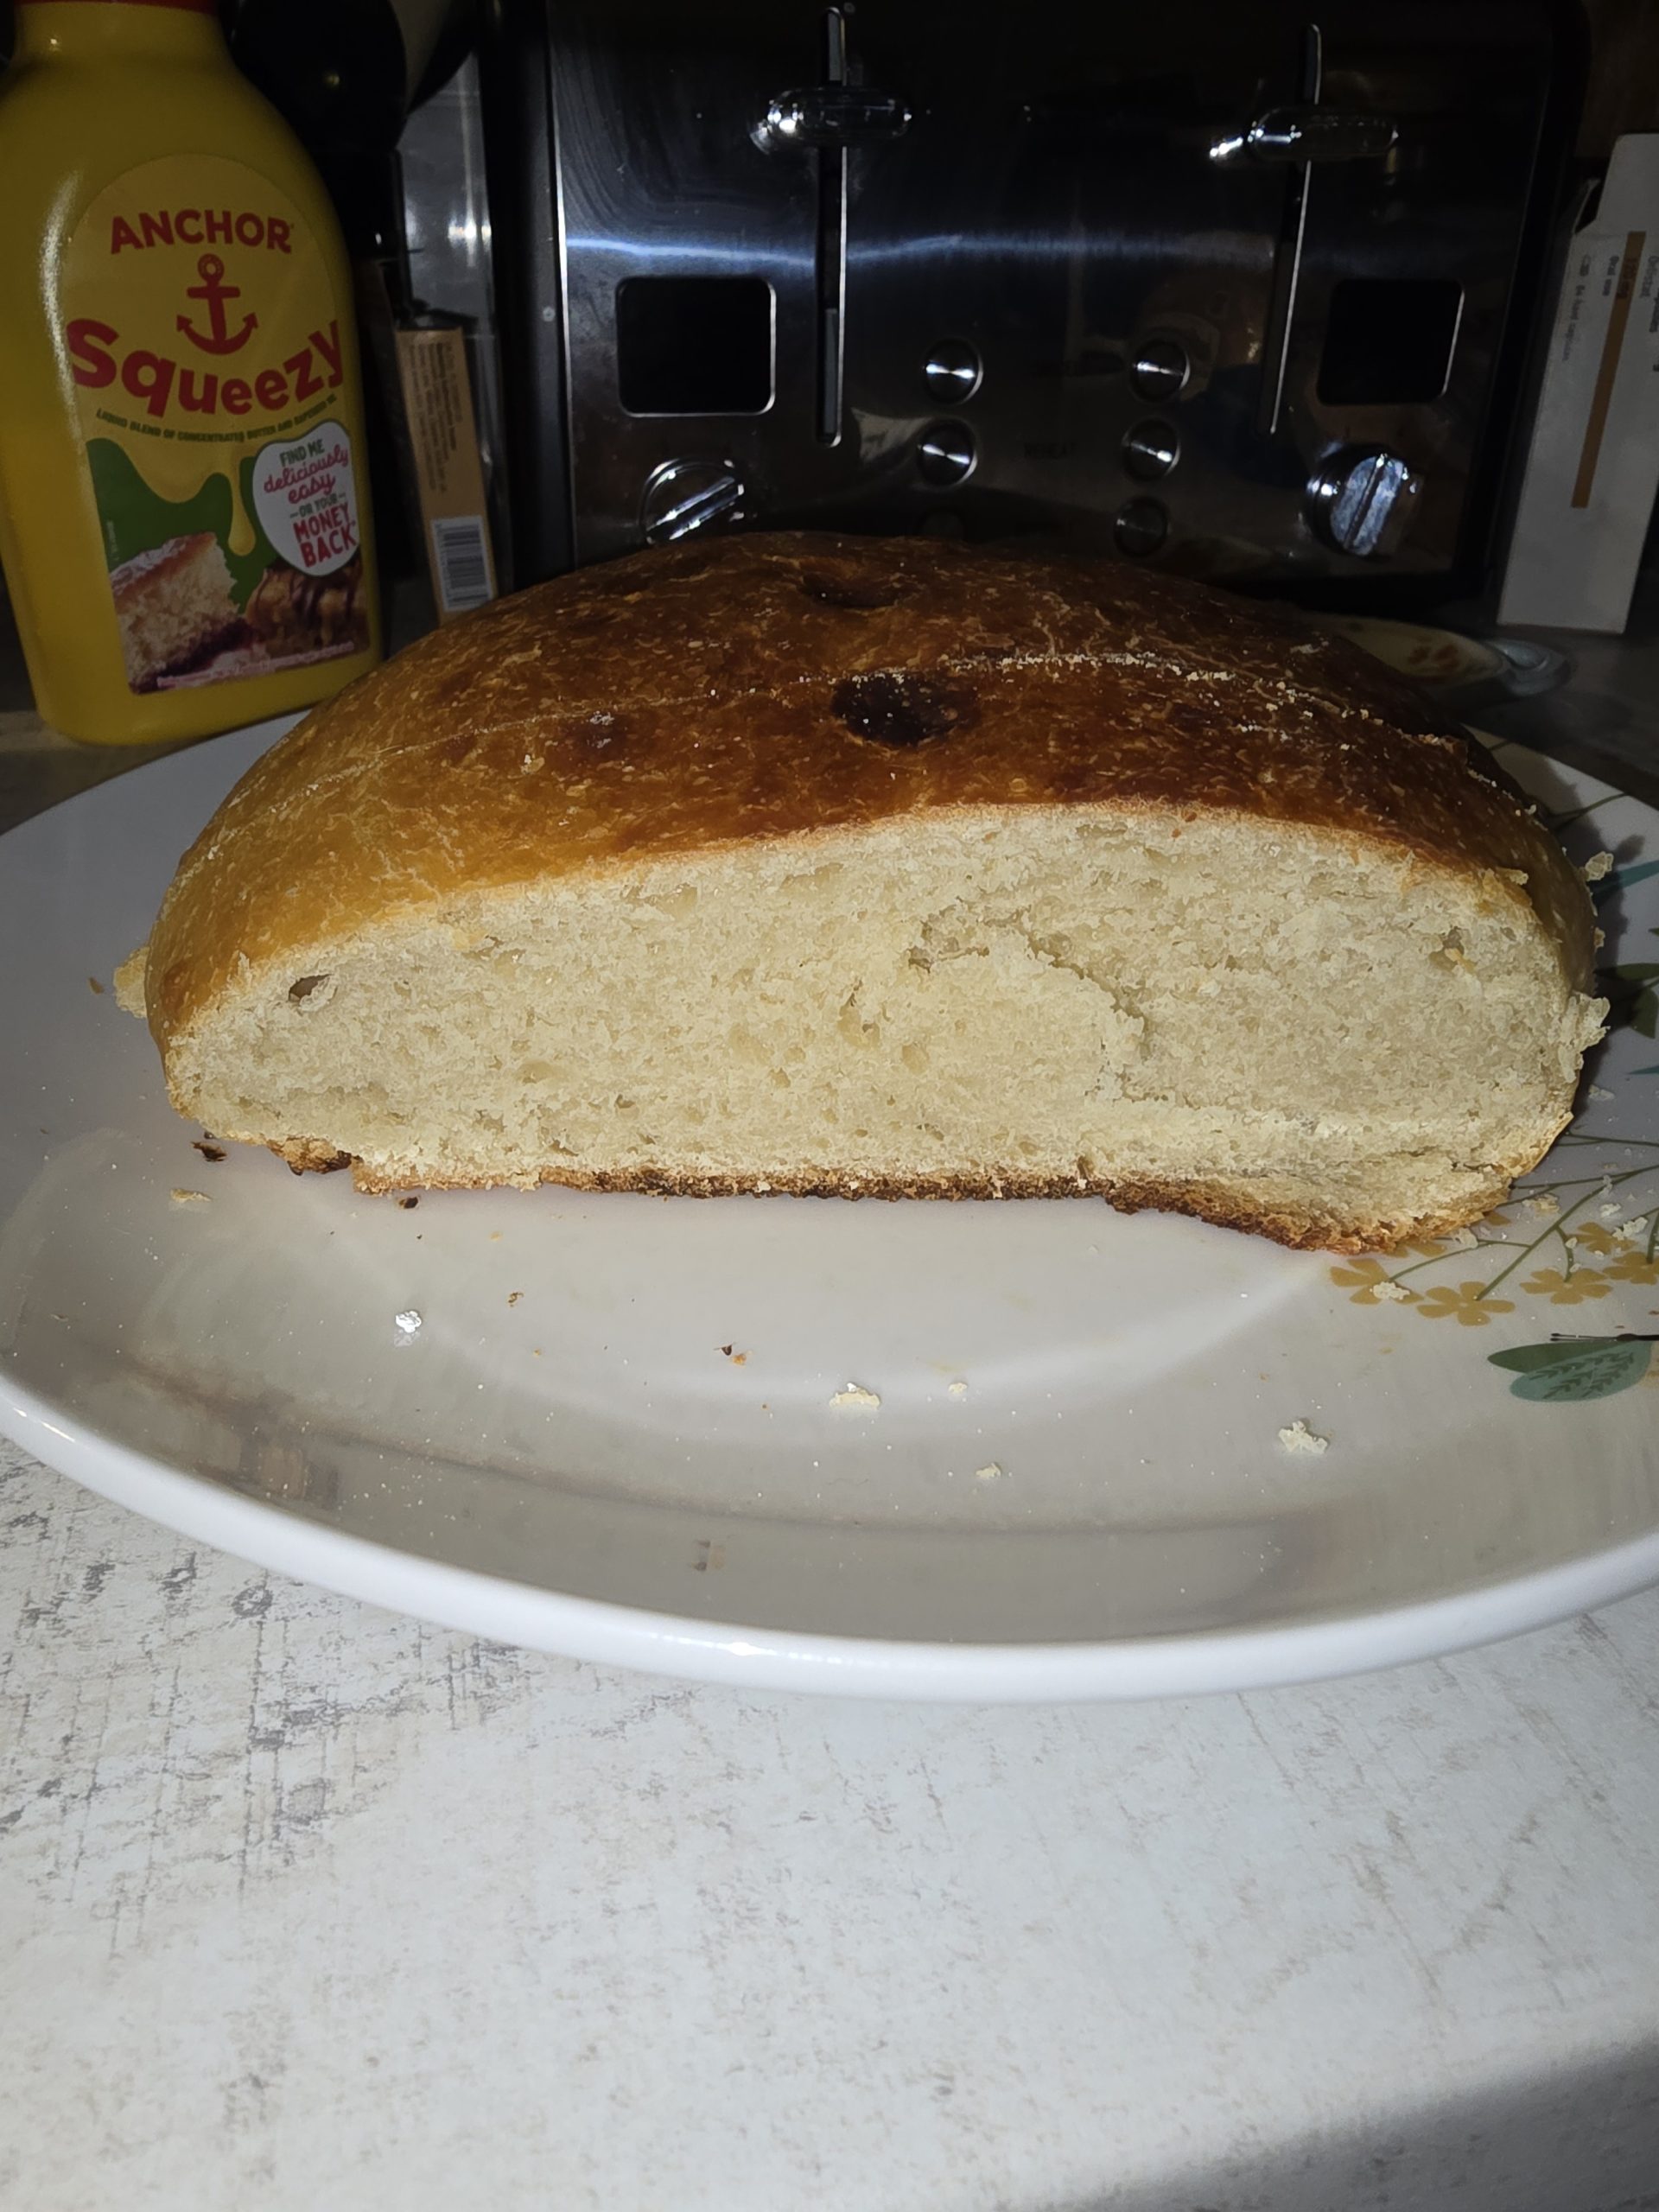
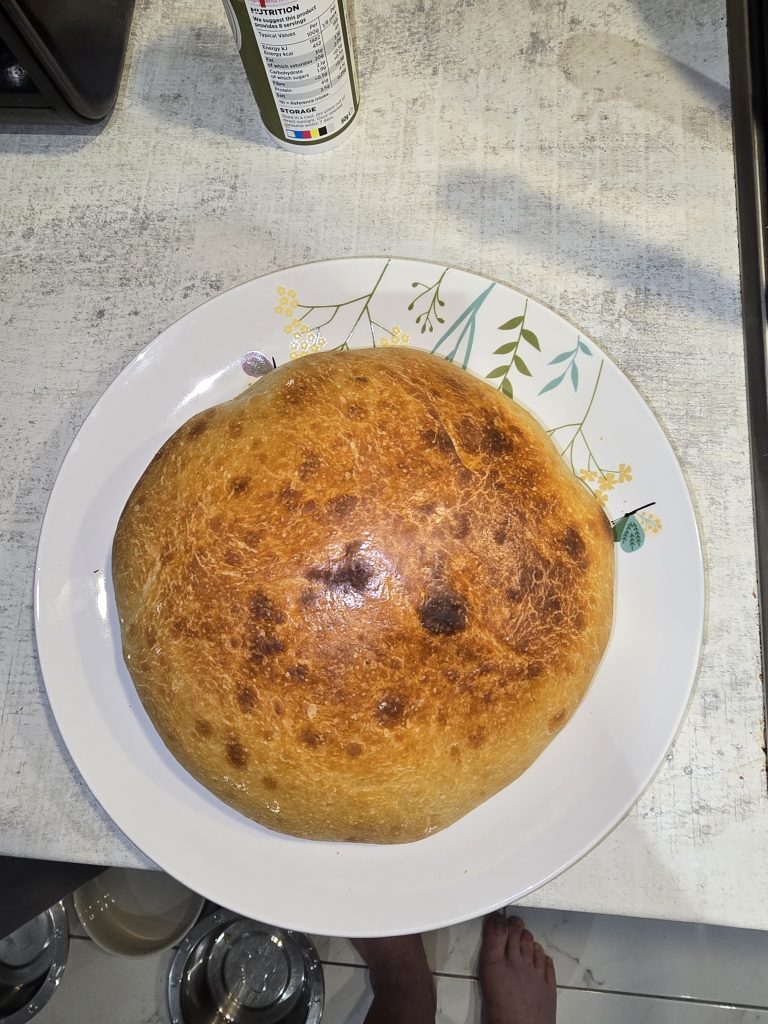
However, the second time, the dough did rise, it did have a few bubbles, and it slight browned when I took off the lid to the dutch oven. So, I cooked it without the lid. This time the dough did rise and it did brown. When I did cut into it, the dough looked a bit undercooked and a bit dense. Nonetheless, it is a significant improvement from my first attempt.
copyright (2025) by berry photography (R) all rights reservedcopyright (2025) berry photography (R) all rights reserved
My takeaways
From my first two experiences, I have learnt kitchen temperature, mixing ratio, and to some extent the temperature of the water used influences the starter. I do expect my next attempt will mean further improvement on my journey in making the ultimate sourdough bread.
A common theme that I talk about the connection between bread and the lessons life teaches us. Bread can be traced back to ancient times and it is recorded in Torah, see for example Numbers 15:19 -21. I will talk more about the Biblical connection when I do my live stream on Challah bread making 27 March 2025.
Moving on, talking about bread it is importnat to remember bread is universal. Meaning it sustains human life and sustains human civilization. Without bread, life as we know it would be alot different. Bread too, before it is baked, is a live. Yeast, feeds off of the sugar in the flour and in the dough mixture resulting in the production of carbon dioxide, CO2. The how much and how quickly the yeast produces CO2, depends on several factors like the quantity of salt in the dough mixture, the temperature of the room, temperature of the water, the amount of water, and the type of flour to name a few. These environmental factors along with other causes the bread to rise and the rising influences both taste and texture. In many ways making bread is analogous to life. It is the ingredients along with environmental factors that influence development. Sometimes, the interaction between environment and ingredients lead to unexpected results.
When I did my first pizza dough and pizza live stream, it did not turn out exactly as planned. From that experience, 2 weeks later showing resilience I once again made the dough and pizza. I did it to show, even with careful planning, much as you plan yeast breads do not always go as planned. In this situation, factors outside of my control and inaccurate measuring led to some unexpected results. Using what I learnt from my first experience, I was able to over come it.
I took that experience and started my next journey, sourdough. On 26 January 2025, I made sourdough bread. This journey was a bit different. I made a sourdough starter and it took longer than I expected to grow. I feel the reason for not growing as quick as I expected is due to the kitchen being on the cooler side, like between 68 and 72 degrees farenheit. As I stated in my video I had reservations about the float test but I did the float test. My starter floated and so, I believed, it was ready. When I baked it, the bread came out hard and did not rise as expected.
I believe there are probably three reasons for this. First, even though my starter floated, I don’t believe it was ready. Second, I used a bit of flour because the dough was extremely sticky and this may have made it more dense. I still debate this because, the dough did not feel, to me, as though too much flour was added. Instead, I come back to the starter and wonder if it did not rise as much as I thought it did. Third, the dutch oven I used was quite large and when I formed the dough it was much smaller.
Out of the three reasons, I feel there were issues with the dough rising and rising issues come back to the starter. During my live feed in just over a week, on sourdough English muffins, I have created a new starter using a different approach.
From my sourdough experience, the life lesson I learnt was patience. Sourdough takes time to grow and to make. Also, from this experience another lesson I would say prepare for the unexpected. In this experience, I thought everthing would go as planned, even though I had some initial concerns. However, after I took out the finished product, it was not what I was expecting.
So, from my two dough experiences, I have learnt patience and resilence.
Hi, and thank you for stopping by to read this very informative post.
In my live streams talking about pizza dough and making pizza I mention that you should use 00 flour and avoid using self-rising flour? So, why do I say this?
It is easy to assume that all flours are created equally and can be easily interchanged. Unfortunately this is not the case with pizza dough. In this detailed article I will explore the four basic types of flour: 00, all purpose, self rising, and strong flour.
Self-rising
Just like the name indicates, self-rising flour contains ingredients that help the flour to rise like baking powder. Baking powder is typically made up of baking soda ( a base – pH > 7) and two acids (pH < 7) cream of tartar and sodium aluminium sulphate.
Furthermore, self rising flour varies by location in regards to salt. In some countries like the US, self rising flour includes salt and in some countries like the UK, salt is not included. Salt is very important when you are cooking with yeast since salt controls fermentation thereby providing a better overall structure to your yeast bread. Too much salt, your bread does not rise and too little, it rises too fast with a very poor structure. So, when making breads, it is important to get your salt measurement correct.
This means, using self-rising flour for pizza dough is probably not a good idea due to pH and self-rising flour already having levelling agents that cause the dough to rise. Typically, if you use self-rising flour for yeast breads, like pizza crust and loafs of bread, you will find that the bread is very soft with a poo fie like texture, which is not what you want. Finally, due to the specific use for self-rising flour it should not be substituted for general all purpose flour when making yeast breads.
00 Flour
To make the best pizza crust requires using a very specialised type of flour 00. 00 is a finely milled flour that is high in protein and low in gluten. This means when you make your pizza dough it will readily absorb the water, if your dough is prepared correctly it will take form quicker and hold its shape. 00 flour is the ideal flour when making homemade pizza dough.
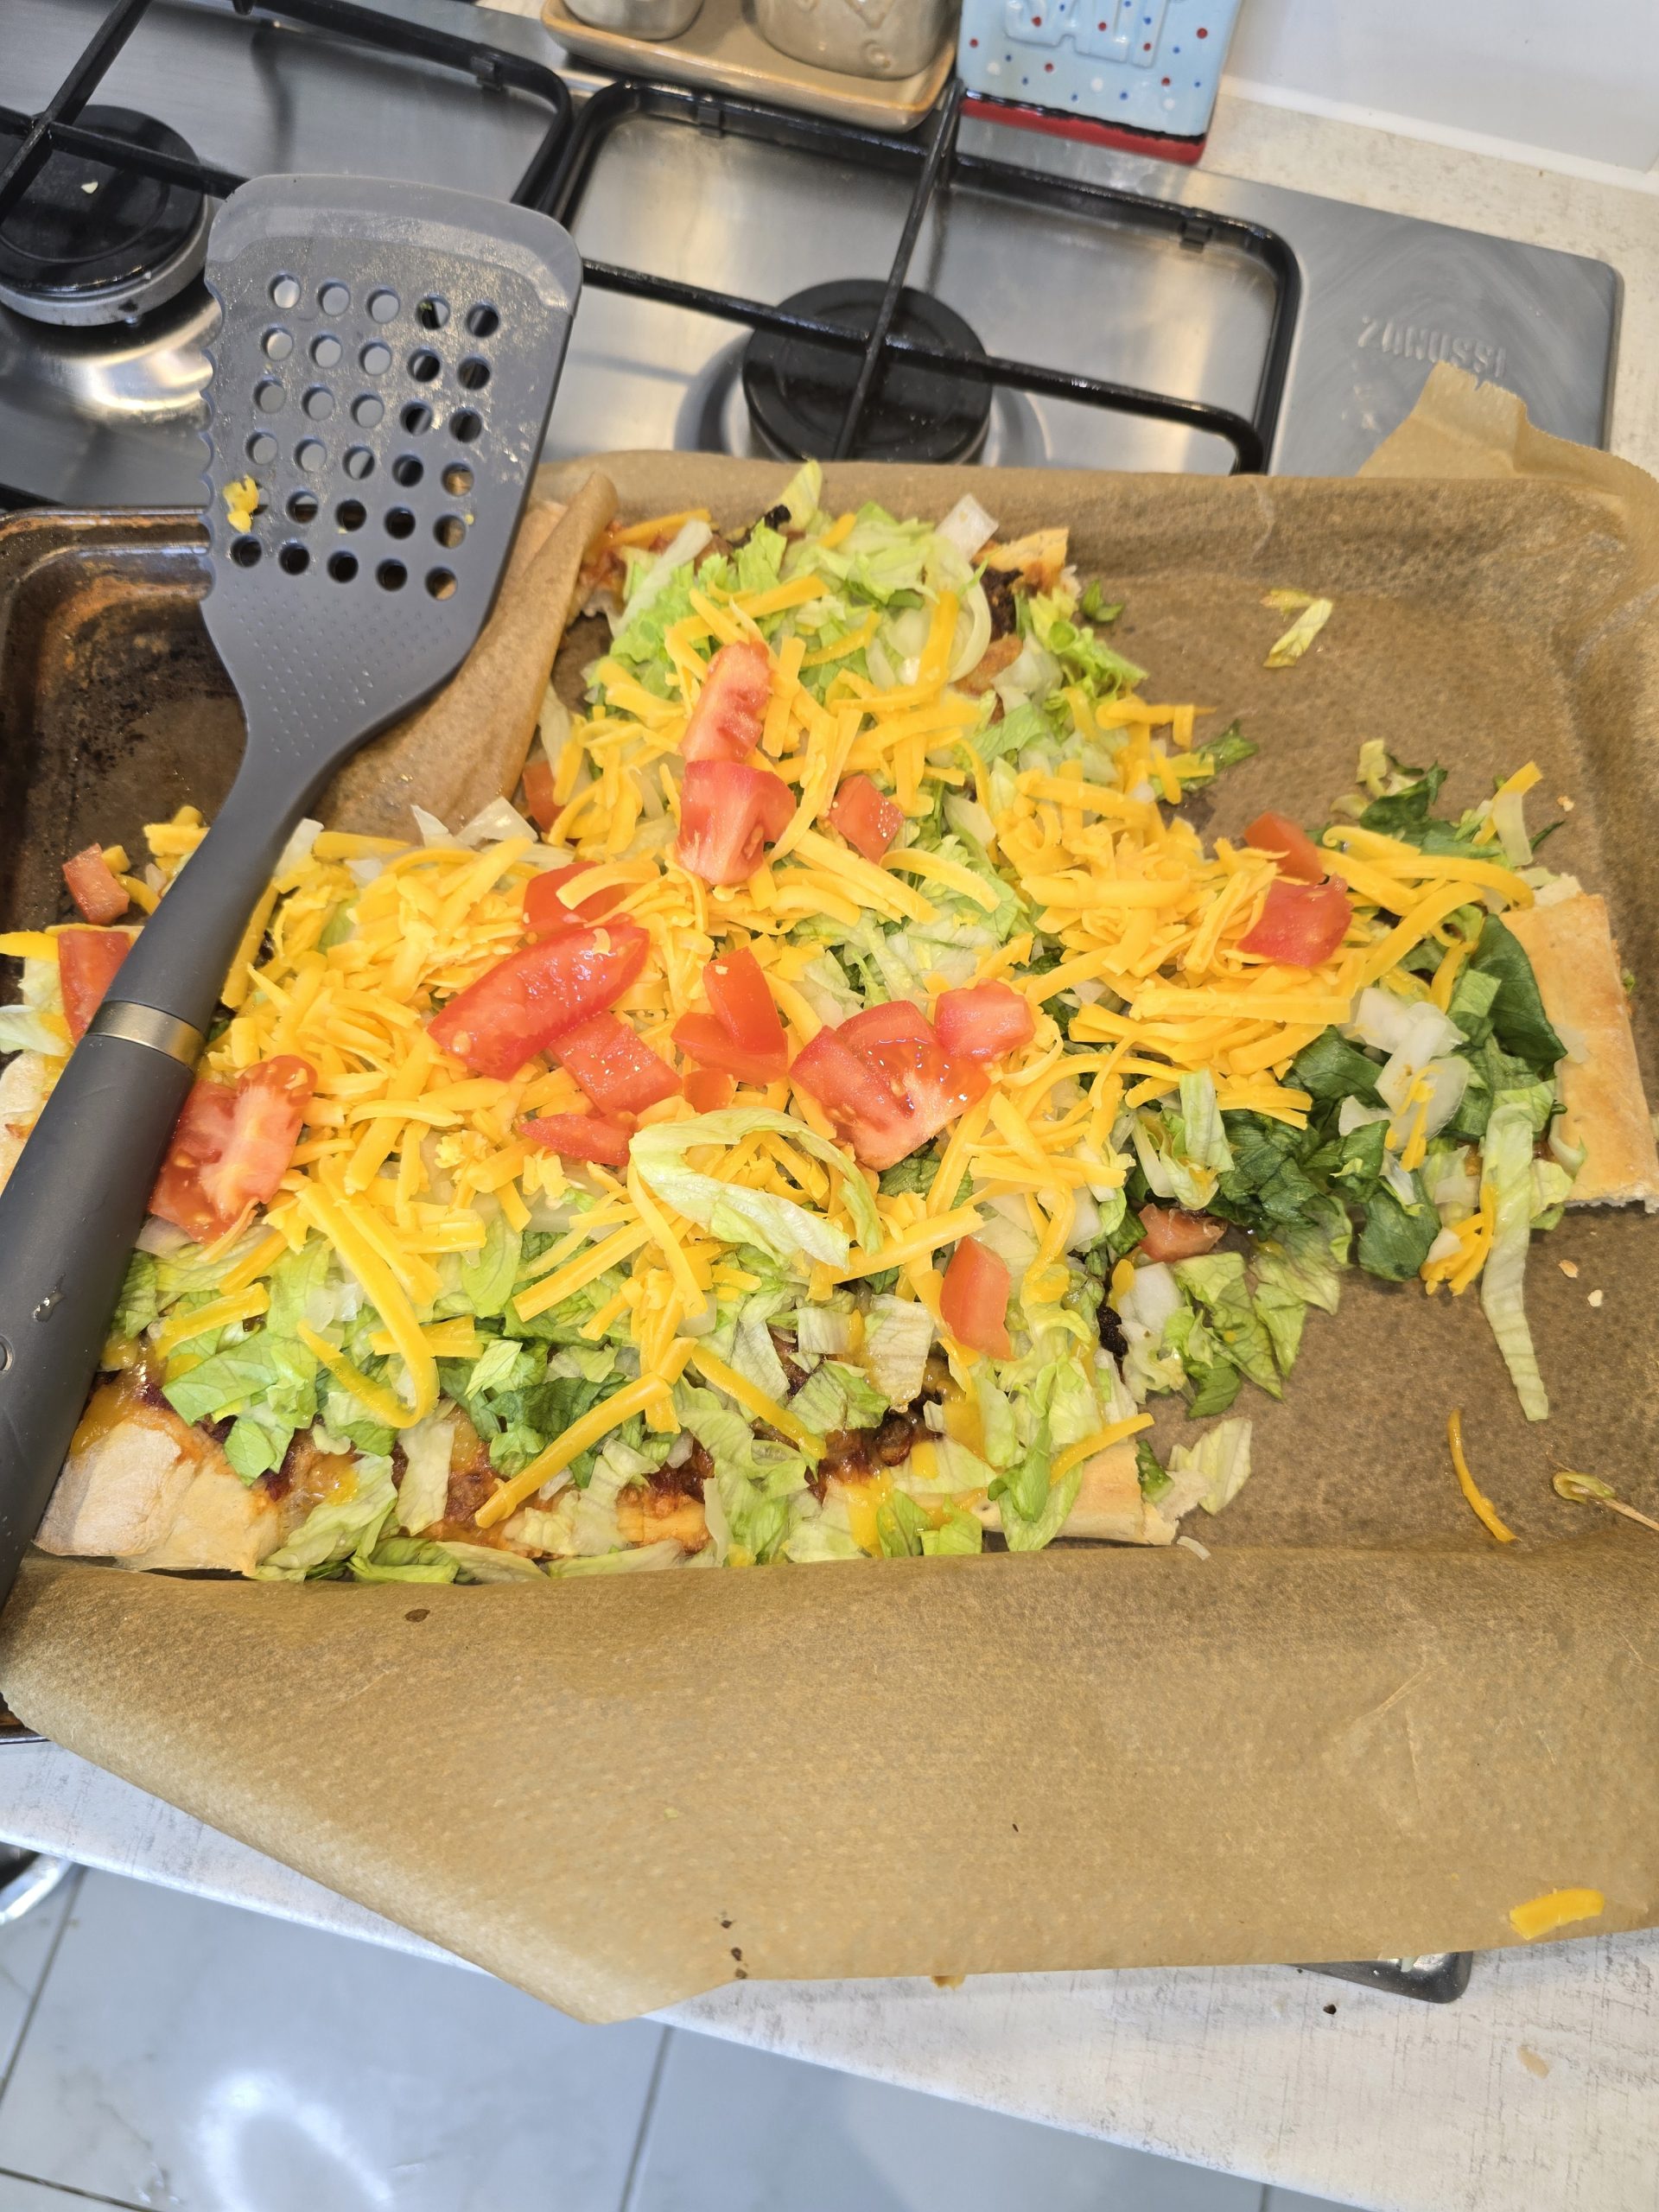
The downside to 00 flour, because of its low gluten level it does not brown as much meaning your pizza crust will be more tan. As you can see in the taco pizza photo, the crust is not a deep rich brown but a lighter tan.
However, the benefits of 00 definitely outweigh one minor drawback.
As for cost, 00 is more expensive. I can buy 5 kg of 00 on Amazon UK for around £10. Whereas, I can buy a store brand 5 kg general purpose flour for somewhere between £4 and £7.50.
My challenge to you, if you have not tried 00 with your pizza dough recipe then I suggest you try it because you will never go back. If you have tried 00 flour for pizza dough then I would love to hear your experience.
All Purpose Flour
All purpose, sometimes called general purpose flour or white flour is like the name says, it is meant for most baking situations. Unlike self-rising all purpose flour does not contain levelling agents and unlike 00 flour, all purpose is a medium mill versus being finely milled. This means you can use all purpose flour for most baking situations but where a more finer milled flour is required, you may need to sift it.
Strong Flour
Strong flour is sometimes called bread flour and it is a good overall flour for yeast breads. Some of you are thinking strong flour and 00 flour are the same. You are almost right since they are both well suited for bread making like pizza dough and will give you very good results. However, where they differ is 00 is more finely milled and 00 is lower in gluten content.
On 3 January 2025, I did make my first attempt at taco pizza; however lack of ingredients and the weather made it impossible to get the ingredients in time. So, I perserved and did not let a set back deter me.
So, if you are one of the approximately 325,000 American expats living in the United Kingdom you know that it is nearly impossible to find an authentic taco and if you love taco pizza then you know it is almost impossible to find. Look no further, I will walk you through how to make your own taco pizza that I demonstrated during my live stream on Facebook on 19 January 2025.
Pre-heat your oven to 400 degrees Farenheit or 200 degrees Celcius.
How to Prepare Your Taco Pizza
Getting the dough ready
Before doing anything take out your bread dough and let warm up to room temperature, allow about an hour. After it has warmed to room temperature, push the dough down and let it rise to double its size. Depending on room temperature, this will be approximately 1 – 2 hours.
For a crispier crust, I recommend doing your prep work while the dough is doubling in size but if you desire a more thicker crust then, I recommend letting the dough double in size. Once it has doubled in size spinkle a bit of flough on your counter, take some dough and roll it out to the size of your pizza pan. The dough should be about 1/4″ – no more than 1/2″ thick. Place the dough in the pan, cover it, and let it rise as you do your prep.
Doing your preparation work
Taco pizza needs to be in two stages.
Stage 1: Making the foundation
In the first stage you need to cook your mince on medium heat until brown. Once it has browned you will need to drain the fat. Depending on how seasonsed you like your tacos, add 1/2 – 1 package of Tesco’s Taco Season – A taste of Mexico taco seasoning to the mince and add a bit of water to the pan. You can use any taco seasoning but I find Tesco’s taco seasoning is the closest I have found to the authentic taste.
Mix together and reduce heat to low and cook until the water has evaporated. As the water evaporates the mince and seasoning begin to make a thick sauce. This will take about 5 – 10 minutes. Once the meat has cooked to the desired consistancy remove the pan from the heat and if you prefer transfer the taco beef to a bowl.
If you are opting for a thinner crust, take some dough and roll it out to about 1/4″ thickness. Place the dough into the pizza pan and shape to it.
Take a fork and pierce the dough in several places. This will keep the dough from contracting too much while cooking and help prevent large bubbles from forming. After piercing the dough, pre-cook the dough into the over for about 3 – 5 minutes.
While the dough is pre-cooking, pour out about 1/4 – 1/2 of the pizza sauce can into a bowl and the remaining taco sauce to it. As you add the seasoning to the sauce, ensure the seasoning mixes well.
The pizza pan will be hot. Take out the dough from the oven wearing oven mits and let it cool down for a few minutes.
After letting it cool, add the pizza sauce and spread around the pan. Now add the seasoned mince and about 1/4 – 1/2 of the oninon you have chopped. Sprinkle the top of the pizza with Mozeralla cheese and let it cook until the cheese browns. Depending on your oven, this will be around 10 – 20 minutes.
Stage 2: Creating the Taco Experience
If find, due to amount of toppings on a taco pizza that it works best to cut the pizza first. After cutting the pizza sprinkle the top with lettuce, onions, cheddar cheese, and top with tomatoes. If you like sour cream you can add sour cream.
Enjoy.
(c) copyright 2025 Be Berry Informed all rights reserved.
What do you have in your home that can allow you to make a quick, nutritious, and inexpensive meal anytime of the day? The answer is an egg. An egg is a versatile that no kitchen should be without. It is used to make many different dishes but more importantly, it is the foundation of simple, easy to make, and cost effective meal the omelette.
An omelette can be made for any meal, incorporate your favourite toppings, and it is a fun and easy recipe to teach to children. It can be made as a stand alone meal or as a part of a larger meal. Best yet, an omelette allows you to get creative and to explore different tastes and textures.
On 12 January 2025, I ran a live stream on making an omelette and in this article, I will share the recipe and tips that are captured in the live stream. Finally, at the end of this article I will provide some FAQs about omelette making.
The basics of omelette making
Making an omelette is easy but it is the technique is challenging. The challenge lies in getting the temperature of the pan right, ingredients you are using, the quantity of ingredients you are using, keeping your eggs from sticking, and timing your eggs to keep them from overcooking.
Preparation for cooking your omelette
Before cooking your eggs it is important to have a clean pan. You may have washed it in your dishwasher but there is an unseen build up of carbon. What works well to remove built up carbon on the pan is to take some coarse koshers salt and using a paper towel, rub the salt throughout the pan. You will see the salt and towel turn black from removing the carbon build up. The pan should feel nice and smooth.
Next, when cooking your eggs, regardless of what you are making, your pan must be preheated and you should preheat no higher than medium heat. Otherwise, your eggs will stick and your butter will burn.
Once your pan is preheated, add your butter and let it melt completely.
Ingredients
In the above video I used:
Shredded mild yellow cheddar cheese to taste.
1 Thinly chopped white onion
1 Tomato chopped
1 package of bacon cooked in the oven
3 – 4 eggs
butter
10″ or 12″ frying pan
dash of salt
Making the omelette
During the video I mentioned there are two types of omelettesFrench and American. My style that I am showing, draws on both styles. However, the style I use comes from my years of making them and evolving my style. In my opinion, my style tends to lean towards the American style.
Preparing your ingredients for the omelette
The first step in making this omelette involves baking the bacon in a preheated oven at 400 degrees or 200 degrees Celsius until brown. To bake bacon in the oven, put the bacon on a broiler pan to allow the fat to drain off and to allow the bacon to cook. Depending on your oven and quantity of bacon, this is typically around 20 minutes and the bacon can be a little underdone since it will cook some more in the pan.
As you are waiting for the bacon to cook, chop your onions, tomato, shred your cheese and put them aside.
Once your bacon is browned, take it out, let it cool for a few minutes, and use a non-stick spatula to remove the bacon. Since the bacon should be crisp you can break it a part for larger pieces or use a sharp knife to make smaller bacon bits.
Cooking your omelette
Preheat your frying pan medium heat for a few minutes to have it warm up. Once it has preheated, momentarily remove it and add 2 tablespoons of butter and swirl the pan around to ensure the butter coats the pan. Turn down the heat to medium-low and add about half of the onions. With the onions in the pan, sprinkle a bit of salt on them and cook the onions until they feel soft with a fork. This will take a few minutes.
Once the onions have soften, add about 1/4 to of 1/2 the tomatoes, and cook for about 1 minute to soften the tomatoes. You want to avoid adding too many tomatoes since tomatoes are high in water and can make your omelette runny.
Now add the eggs, cheese and some of the bacon. Let the egg settle a little bit. Using a non-stick spatula, swirl the egg around the pan and lifting up the sides of the egg to allow the egg to go under and settle. After the egg has settled, using the non-stick spatula, fold a part of the edge inwards. This should only be no more then about a 1/3 inwards.
Wait a few moments and do it again, repeat until the omelette is completed folded, rolled. After you have fully rolled, folded the omelette, let it cook for about 1 – 2 minutes. Ever so, gently flip the omelette to the other side to allow it to cook. Do this for another 1 – 2 minutes.
Your omelette should be lightly brown and somewhat thin.
Slip the omelette off of the pan and onto your plate. Top with remaining ingredients.
Frequently Asked Questions
What can you add as sides to an omelette?
Depending on your taste and preference. Common sides include bacon, hash browns and toast for breakfast. For lunch or supper you may want to add a small steak, burger, or sandwich.
How much does it cost to make an omelette?
Eggs, at current prices, run about £3.60 of 12 large eggs or about 30p per egg and then your ingredients that you add. So for three eggs it is £0.90 and I estimate the cost of what I made is under £2.00
What can you add to an omelette?
You can add almost anything you want. However, you need to consider water content and quantity since these will impact your results. Omelettes work great for left-overs and if there are things in your fridge you want to eat. So, making an omelette can be a real money saver. Finally, you will need to consider pre-cooking some of your ingredients to soften them up. Otherwise you may find the egg cooks but the rest does not.
How can you involve children in making an omelette
Making an omelette is easy to teach to a child, especially pre-teen and onwards. Younger children you can involve by asking them what do they want to add to it. With parent supervision, get them to collect the ingredients and involve them in making it.
how long does it take to make an omelette?
A lot depends on what you are making and the preparation needed. However, to actually cook your omelette, I estimate no longer than 5 minutes and the live stream I did, was done in about 30 minutes.
The event on 19 January is the result of planning that did not go as expected during my live stream on 5 January 2025. By having this recipe you can follow along with me on the 19th.
As I said during my live stream on 5 January pizza is a journey. There is a lot of can do to vary it, to learn from it, and it is a great way to spend time with your children to create memories while teaching them a valuable skill.
The below video is from my live stream on 5 January and it will be one of the pizzas that I will make on 19 January. However, the other pizza its recipe will not be available until after the live stream.
Ingredients
To make this very delicious pizza you will need the following ingredients
1/2 lb (240g – 300g) of 20% fat mince beef. Alternatively you can use 240g – 300g of Italian Sausage.
1 large Green Pepper – chopped
1 medium to large (preferably) white but you can use a yellow onion. Sliced into rings
1 package of pepperoni
1 can Mutti Pizza Sauce Aromatic or Mutti Pizza Sauce Basil and Oregano
1 to 2 packages of 240g or 8 oz of Mozzarella Cheese
Preheat over to 350 degrees or 180 – 200 degrees Celsius.
Tips regarding pizza ingredients
Regarding the mince, I have found 1/2 lb works well because it keeps the crust from getting soggy. However you can use up to a 1 lb of mince. If you wish to had a bit of spice to your mince, you can cook it with fennel seed or using taco seasoning. Alternatively, if you want a bit of spice to your pizza you can use Italian sausage.
If you are wondering why I have stated 20% fat mince this is because the high fat content retains the flavour more and works well if you season it. While there is nothing wrong with using mince with a lower fat content, I find I get the best results using 20%.
As for the pizza sauce, I recommend Mutti Pizza sauce because it is a very high quality sauce that rivals any sauce you can make at home. It gives a very authentic pizza sauce flavour and it is one of the few items I recommend you buy versus making it yourself.
Next, regarding the pizza dough. If you have prepared the dough in advance, take it out of the refrigerator and keep it covered. The dough should warm up to room temperature (about 45 minutes to 1 1/2 hours) and after reaching room temperature the dough should be pressed down and allowed to rise again, for at least 15 minutes. Typically, pressing down the dough should occur right before you brown the mince.
Finally regarding the Mozzarella cheese. This is where you can make this pizza your own. I find how much cheese to add is a personal choice. Plus you can experiment with adding other cheeses like mild cheddar and Parmesan cheese.
Making the Pizza
This is a fairly quick pizza to make.
First you will need to season the mince as you like it, break it a part, and brown it. The mince should be relatively fine. Once fully cooked, drain the fat and let the mince cool down.
Next, if you have not already chop the green pepper and cut into very thin rings, the onion. Please note, if the rings are cut too think they will not cook all of the way through.
Open the pepperoni and cheese.
Now take a bit of flour and lightly brush your counter with it, very lightly dust your bread dough with it, and dust your rolling pin with it. Take the dough and roll it out to about 1/4″ for a thinner crust and up to 1/2″ thick for a thicker crust. Once rolled out, take the crust and transfer to the pizza pan.
Take a fork and pierce the dough in several spots and then place the dough into the preheated oven for about 5 minutes and wearing hot mits then take out. The dough and pan will be hot.
Add the pizza sauce to the dough. It is likely you will have some sauce remaining and it can be refrigerated for later use. Take a handful of mozzarella cheese and sprinkle on top of the sauce. Now add about 1/2 of the pepperoni covering the bottom of the pizza then add onions and green pepper. After adding the ingredients, liberally cover the top of the pizza with cheese and add more pepperoni.
Cook the pizza for 10 – 20 minutes until the cheese is brown and bubbling. The crust should be light to moderate brown. Once it has achieved its desired consistency take out the pizza. Due to it cooking at a high temperature, it will be hot so please use hot mittens to take out and let it cool up to 5 minutes to allow you to cut through.
To assemble and bake the pizza is approximately 30 minutes and cost will depend if you have all of the ingredients. Total cost for the ingredients, minus the pizza dough, would be between £8 – £12 or around £1 per slice.
Hi all and thank you for stopping by to learn how to make a simple pizza dough in less than 10 minutes.
In this article I will present to you the recipe I used during my live feed and you can check out my analysis of my results from making the dough.
When you make this recipe it is important to remember a few points:
The temperature of your water is paramount. Too cold and the yeast will not rise and too hot it will kill the yeast. Water temperature should be around 100 degrees Fahrenheit or about 40 degrees Celsius. If you are like me and go by feel, 100 degrees Fahrenheit is about the same temperature as you would heat a baby’s bottle.
Balance between flour and water is dependent on many factors like type of flour, temperature of your room, temperature of the water, how you are measuring your flour, and other factors. Your dough should feel smooth but slightly sticky to the touch.
Don’t cut back on salt or sugar in the recipe since this will throw off your results.
If you let your dough to rise in the refrigerator for at least overnight and up to the 72 hours it will produce a more evenly rising dough without the large air holes and it creates, if left in for at least 48 hours, a very subtle taste.
Do not use fast rising yeast since this will not produce the results you need.
Do not use self rising bread flour since you are using yeast and self rising will cause the dough to over rise. Instead use either regular bread flour or preferably 00 bread flour, which is more conducive to pizza.
This recipe is not suitable for bread machines.
Ingredients
4 1/2 cups of flour ( I use il Molino Chiavazza NA 00) this is a flour designed for pizzas and produces a very nice crust
1 1/2 Tablespoon of white granulated sugar
1 Tablespoon of fine Kosher salt
2 teaspoons of yeast or 1 packet of yeast
3 Tablespoons of oil (olive oil is preferred. however, you can substitute vegetable oil or if no other oil is available sunflower)
1 3/4 cups of warm water
1 large bowl
Aluminium foil or a towel.
Directions
Combine the dry ingredients (flour, salt, sugar, and yeast) into a mixing bowl. Using a mixer set to pulse or if using a hand mixer, briefly mix the dry ingredients together.
Next add the water and olive oil to the mixture and mix until a soft ball forms. The ball will be a bit sticky, don’t worry about how sticky it is.
If you are using a stand mixer then switch to using a dough hook and if you are using a hand mixer then it is best to hand knead the dough. If you are hand kneading the dust your counter with a bit of flour and knead for 10 minutes until the dough is smooth
However, if you are using a stand mixer with a dough hook, switch the mixer to a low speed setting and let it mix for about 2 minutes. Scrape the sides and work any dry ingredients into the ball and mix again for at least another 2 – 3 minutes on low speed setting. Check your dough. If dough is feeling sticky add 1 – 2 tablespoon of flour but if it is feeling stiff then add a little water, like a teaspoon or two, to soften it up. Run the mixer again for about 3 minutes, check again and making any fine adjustments. If the dough is not kneading and it feels as though it needs more kneading then increase the speed of your mixer to no higher than medium. After about 10 minutes, you should get a dough that is smooth, springy (elastic), and have subtle (slightly sticky touch to it).
Now, take a little bit of the oil and coat the inside of the bowl with the oil. Place the dough in it and in swipe the dough around the bowl to ensure all sides of the dough is covered in the oil. Cover the bowl with the dough in it using aluminium foil. You can coat the inside of the foil with oil, this will keep the dough from sticking to it. Finally place the bowl into the refrigerator and let the dough rise, at least overnight and up to three (3) days.
Cost
The cost to make this is minimal and the most of the ingredients you should already have in your home. If you are to buy 00 bread flour, I believe the 5 kg package I showed in the live stream was £9.99 on Amazon.co.uk. Otherwise, regular bread flour will cost you between £1 – £3 (depending on brand and weight).
Time to make
This is a fairly quick recipe to make since there is no activating the yeast, which can take 10 minutes to do. From doing the preparation to placing the dough in the refrigerator, total time should be under 20 minutes and depending on several factors (e.g. room temperature, water temperature, and your location), to actually make the dough may be less than 10 minutes.
Be Berry Informed is about for lack of a better word, lifestyle and more importantly, it is about how to make your life easier. As a part of that concept, simplifying your life, Be Berry Informed on 3 January 2025 lived streamed how to make the perfect pizza dough
In this article, I will deconstruct, review, what went well and what could have been better. I am doing this for two reasons. First, it is demonstrate self-reflection. To show my followers that it is important not to give up and how you can take an experience and develop from it. Second it is to set the scene for another event, where I come back and make improvements.
Bread Dough:
The Good:
Overall I was pleased with the dough. I felt I did get the temperature right and the simplicity of the recipe meant it was an easy one to teach.
The Bad:
When doing the video, I lost count of how many cups of flour I measured. I think this left the dough a bit sticky but it was very manageable. However, when it mixed it did not mix as well as it should have. This was a bit of a disappointment for me.
Pizza
The Good:
I was very pleased with the video and I felt it went very well. I felt I was able to explain the reason for choosing making pizza and how it can be an enriching experience for families.
The Bad:
Before live streaming, I struggled with what to do with the pizza dough. Do I take it out 90 minutes before streaming to have it reach room temperature and to flatten it so that it could rise or take it out of the fridge to show the viewers that bread dough can rise in the refrigerator. I opted for the latter because I felt, it by the time I assembled the pizza that the dough might have enough time at room temperature. Unfortunately, when I cut into the dough the dough did not have the texture I wanted and was disappointed. Also, after pre-cooking the dough for 5 minutes it was clear that my miscalculation on flour showed.
Another thing that could have been done better, was the planning for the second pizza. I knew I had cheese but when I took it out it was clear that it could not be used. The tomatoes were borderline usable and for a video, I chose not to use them. and because of the weather conditions, I could not run to the store for cheese and tomatoes. So, I had to re-plan the event.
Desert Pizza
The Good:
Be Berry Informed focus on lifestyle and as a part of the concept of lifestyle, Be Berry Informed is helping families save money so they can enjoy the success. Success does not mean being financially wealthy. Instead is about the wealth that comes from family time, being able to enjoy the money you make from working instead of paying bills, Be Berry Informed is about giving you ideas on how you can get the most from life. So by re-purposing the pizza dough it was to ensure you were able to get the most the money you spent and to reduce the total cost of the meal.
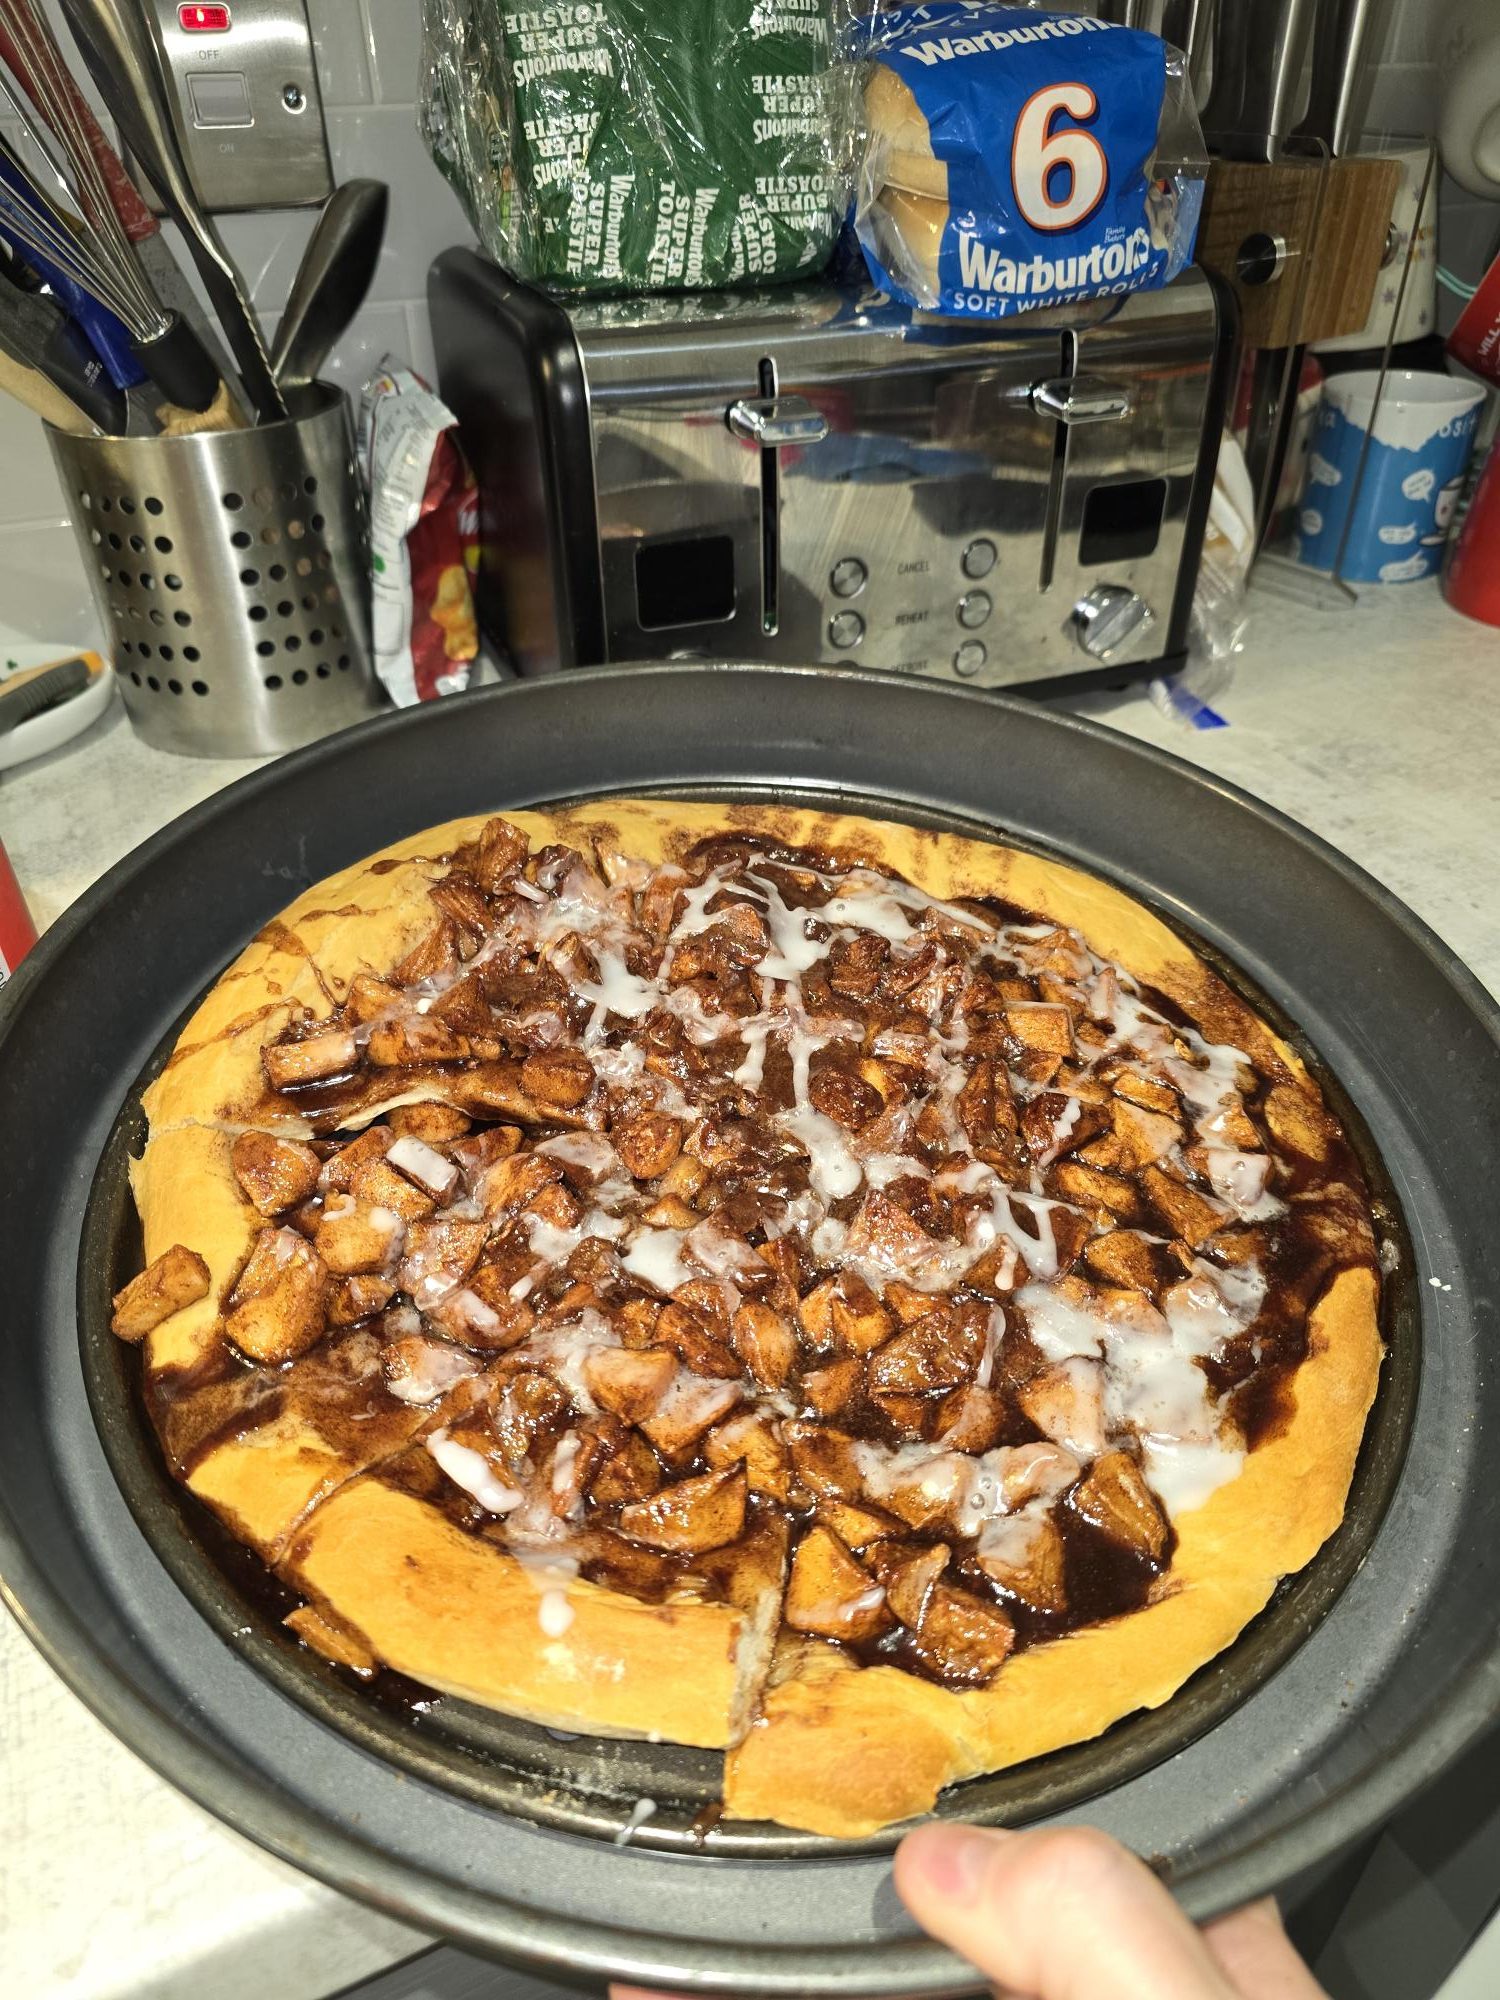
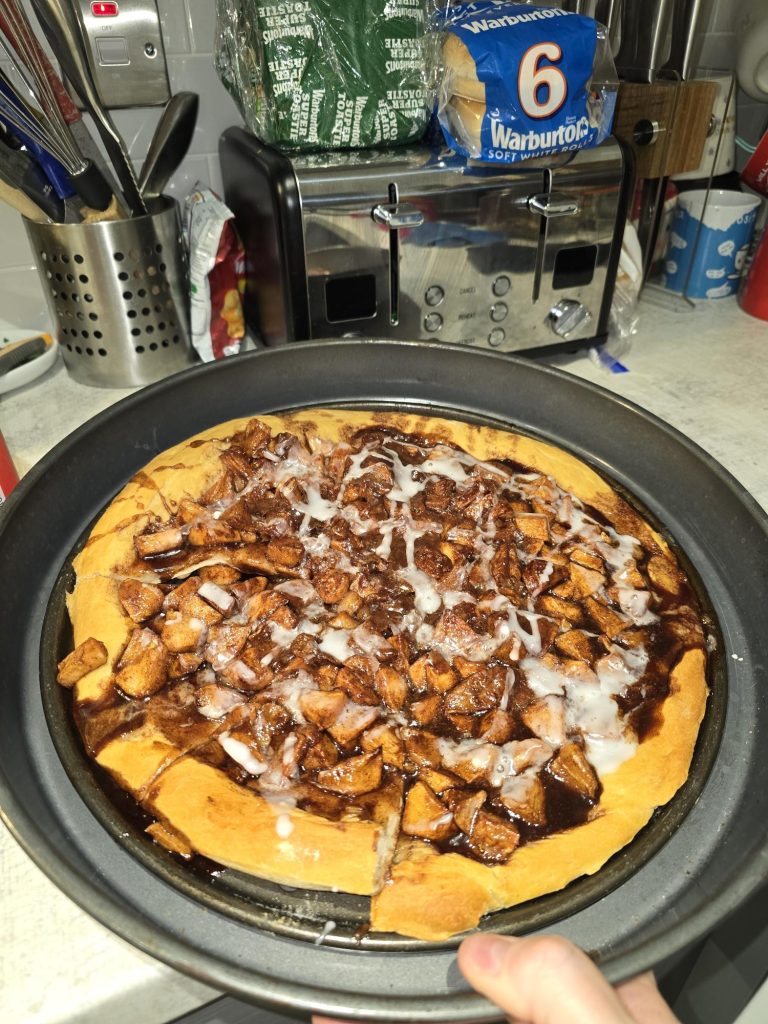
When I was younger I did make a lot of apple pies and apple crumble and from that experience, I had an idea of the basic recipe for the desert pizza. However, it has been a few years since I made an apple pie or crumble. This meant I was not 100% confident in my recipe. Nonetheless, when cooled enough to eat the filling was very good.
copyright (2025) – Berry Photography (R) all rights reserved
The Bad:
I believe if I had 3 cups of sugar instead of 2 then the sauce would have the consistency I wanted. Because it was a bit runny, the sauce did drip into my oven creating a lot of smoke. Also, I think, I might have added too much butter and probably should have cut back just a bit on it. As for the crust, I feel it sort of worked but given some of the issue, I feel it took away from it. Plus pizza dough crust is probably not the best crust for a desert.
Finally
I will plan two events in two weeks and re-try this and see what further success comes from retrying.